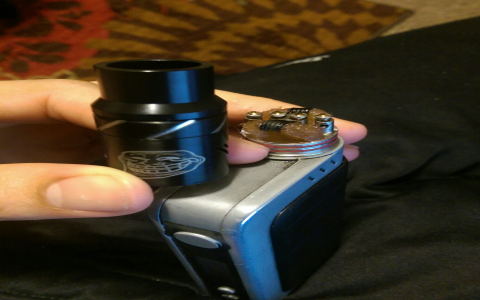
Alright, so I wanted to mess around with my e-cigarette the other day and decided to change the coil wire. I’ve done it before, but this time I thought, why not document the whole thing? Maybe someone out there is thinking of doing the same and could use a little walkthrough.
First off, I gathered all my stuff. You’ll need your e-cigarette, obviously, the new coil wire, some tools like wire cutters, pliers, and a screwdriver. Make sure you have a clean workspace, too. You don’t want any gunk getting into your device.
Choosing the Right Wire
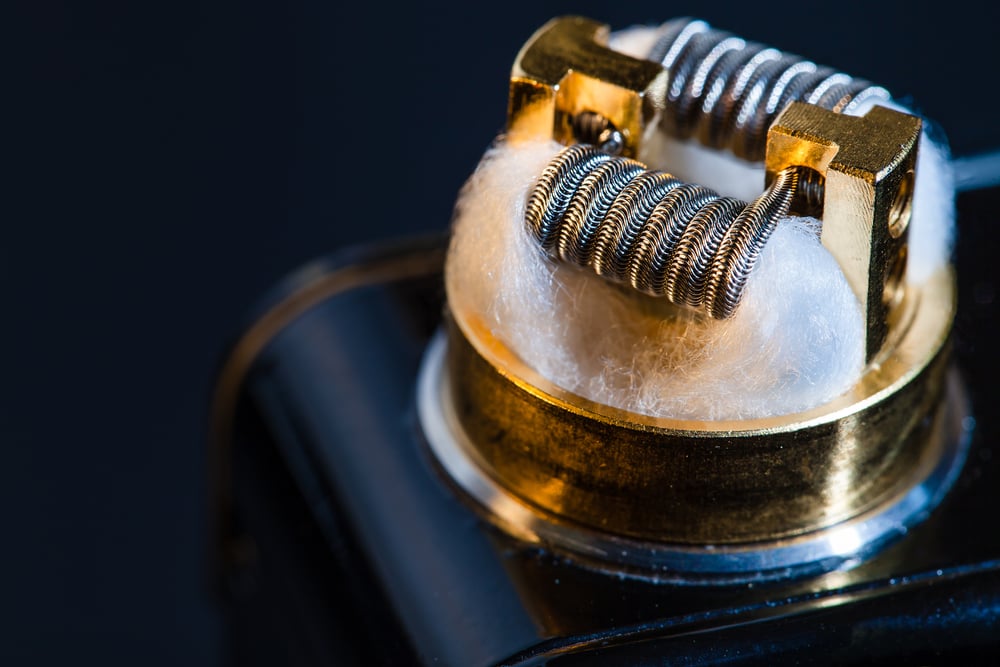
Now, about the wire. I went with stainless steel this time – SS316L to be exact. I’ve heard it gives a cleaner flavor compared to Kanthal, which I used last time. But that’s just me. You do you. There are tons of options out there, each with its own pros and cons. Like, some people prefer sub-ohm coils for bigger clouds and flavor, while others like high-resistance coils for a more traditional throat hit.
- Get your e-cig and tools ready.
- Pick your wire type (I chose SS316L).
- Make sure your workspace is clean.
Getting Down to Business
I started by taking apart my e-cigarette. It’s pretty straightforward, just unscrewing a few parts here and there. Then I removed the old coil. A bit of advice: pay attention to how the old coil is installed because you’ll want to install the new one the same way.
Next, I cut a piece of the new wire. How much you need depends on your device, but I usually cut a bit extra just in case. I wrapped the wire around the screwdriver to form the coil. This part can be a bit tricky, and it took me a couple of tries to get it right. I aimed for about 0.6 ohms resistance, which is tighter and maybe a bit warmer vape.
- Disassemble your e-cig.
- Remove the old coil.
- Cut and shape your new coil.
Putting It All Together
After shaping the coil, I installed it in the atomizer. This involved screwing it into place and making sure the leads were properly secured. Once that was done, I trimmed the excess wire with the cutters.
Then, I pulsed the coil a few times to check for hot spots and make sure it was heating evenly. This is important, don’t skip this step! You don’t want a coil that heats up unevenly. Finally, I put everything back together, filled the tank with e-liquid, and took a test puff.
- Install the new coil.
- Trim excess wire.
- Pulse and check for hot spots.
- Reassemble and test.
And there you have it! It’s not rocket science, but it does require a bit of patience and a steady hand. The new SS316L coil is working great, and I’m really enjoying the clean flavor. If you’re thinking about building your own coils, just go for it! It’s a fun little project, and you might even discover your perfect vape setup in the process. But, you know, be careful and do your research first. Vaping is all about personal preference, so don’t be afraid to experiment and find what works best for you. Happy vaping!


